Branches are the final component of Git version control. This gives us four core elements to work with throughout the rest of this tutorial:
- The Working Directory
- The Staged Snapshot
- Committed Snapshots
- Development Branches
Branches are the final component of Git version control. This gives us four core elements to work with throughout the rest of this tutorial:
In the last module, we learned how to record versions of a project into a Git repository. The whole point of maintaining these “safe” copies is peace of mind: should our project suddenly break, we’ll know that we have easy access to a functional version, and we’ll be able to pinpoint precisely where the problem was introduced.
Continue readingWriting multi-platform code has its own challenges, but if you use the canImport() compiler test then one big challenge is solved for you: you can write one chunk code to run if a specific module is available, and another chunk otherwise.
Now that you have a basic understanding of version control systems in general, we can start experimenting with Git. Using Git as a VCS is a lot like working with a normal software project. You’re still writing code in files and storing those files in folders, only now you have access to a plethora of Git commands to manipulate those files.
Continue readingIntroduction
Git is a version control system (VCS) created for a single task: managing changes to your files. It lets you track every change a software project goes through, as well as where those changes came from. This makes Git an essential tool for managing large projects, but it can also open up a vast array of possibilities for your personal workflow.
Continue reading|
|
There several ways to loop through an array in Swift, but using the enumerated() method is one of my favorites because it iterates over each of the items while also telling you the items’ position in the array.
Here’s an example:
[swift]
//How to enumarate a array
let array = [“Hulk”, “Spidy”, “Thor”]
for (index, item) in array.enumerated() {
print(“Found \(item) at position \(index)”)
}
[/swift]
That will print “Found Hulk at position 0”, “Found Spidy at position 1”, and “Found Thor at position 2”.
|
|
Just like me, I am sure you all have been annoyed by those empty table view cell after your data is loaded.
@IBOutlet internal var tableView: UITableView! {
     didSet {
      tableView.tableFooterView = UIView()
      }
}
|
|

Beside Swift being powerful, expressive language with a flexible, elegant syntax. There is one of the features I appreciate most is native support for error handling with try keyword.
It is easy to ignore errors in Objective-C. You have to do a bit of extra work to enable error handling.
[swift]
NSError *error = nil;// Initialize Data With Contents of URL
NSData *data = [[NSData alloc] initWithContentsOfURL:URL options:0 error:&error];
if (error) {
// Error Handling …
}
[/swift]
|
|
We all know about MVC and it’s shortcomings. I would love to explain MVVM that make developer’s life as well as testing quite easy
Before we take a look at View Model. let’s tale a look at something familiar. You would feel home if you’ve been using the Model-View-Controller pattern to build Swift applications. The moment the view controller has finished loading its view, it performs a network request. It delegates this task to the APIManager class, Continue reading
|
|
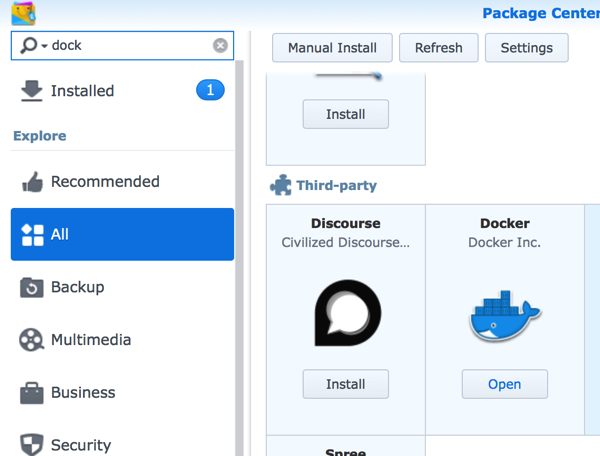
Very first step is to getting docker installed to your Synology NAS. Open package manager and search for docker. Click install.
